There are lots of blog templates available on internet which are free but every blog has some different feature and widgets .Many websites and
blogs today using a sticky or fixed navigation menu bar in their sites template which gives extra advantage to their reader that when they scroll to view their posts they can easily choose different pages from navigation menu without going back to the top. For example you can view my blog Navigation menu bar which is sticky. So, if you have blog and you don’t have this feature then here is your solution.
So, it is not some geeky task you just have to follow these steps to Create A Sticky Navigation Menu Bar.
How to create A Sticky Navigation Menu Bar Step By Step
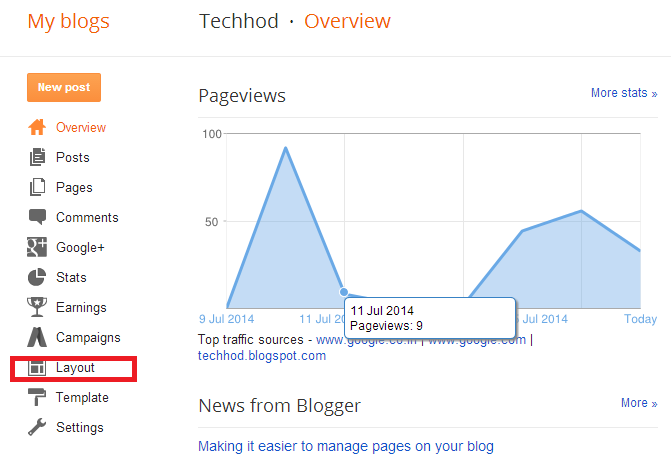
Step 1 : Go to Blogger Dashboard and Click on Layout
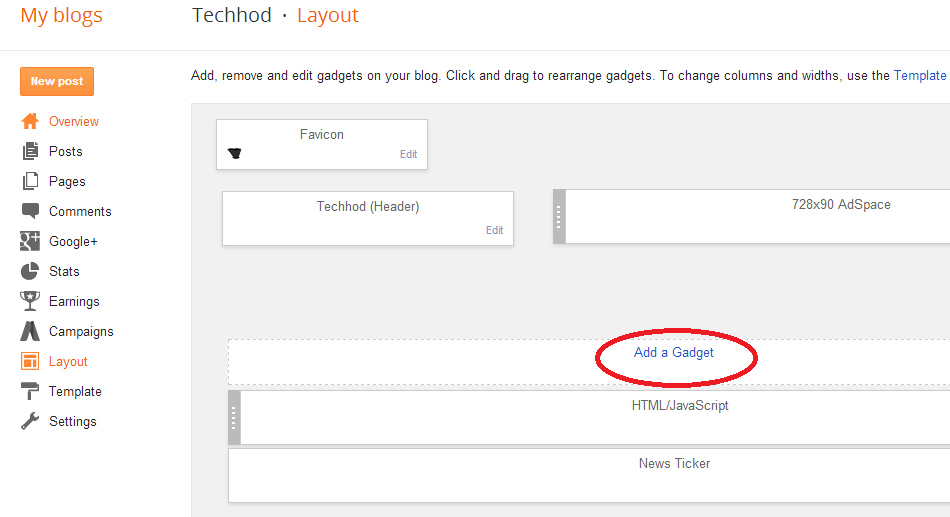
Step 2: Click on Add a Gadget
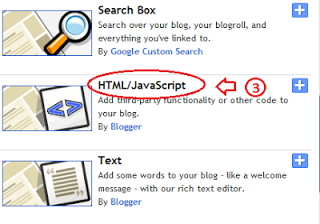
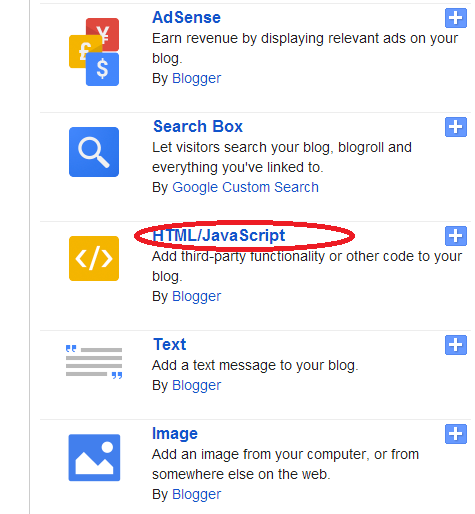
Step 3: Now a pop up window will open, scroll down and click on HTML/JavaScript
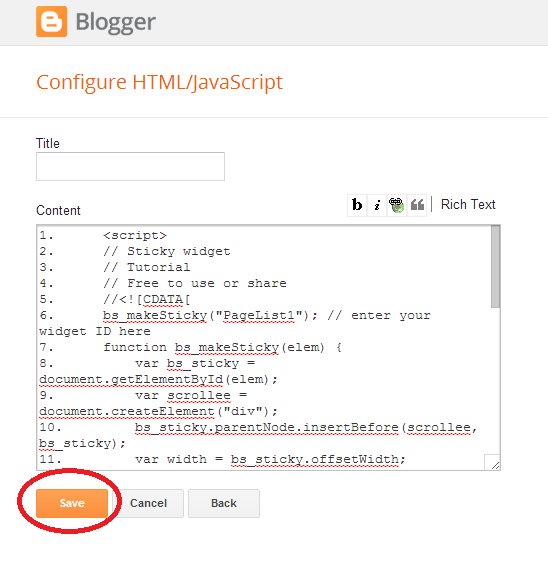
Step 4: Now paste the given java script code which given below in the content box and click on save.
Java script code, copy and paste it in HTML/java script content box which mentioned in step 4
<script>
// Sticky widget
// Tutorial
// Free to use or share
//<![CDATA[
bs_makeSticky("PageList1"); // enter your widget ID here
function bs_makeSticky(elem) {
var bs_sticky = document.getElementById(elem);
var scrollee = document.createElement("div");
bs_sticky.parentNode.insertBefore(scrollee, bs_sticky);
var width = bs_sticky.offsetWidth;
var iniClass = bs_sticky.className + ' bs_sticky';
window.addEventListener('scroll', bs_sticking, false);
function bs_sticking() {
var rect = scrollee.getBoundingClientRect();
if (rect.top < 0) {
bs_sticky.className = iniClass + ' bs_sticking';
bs_sticky.style.width = width + "px";
} else {
bs_sticky.className = iniClass;
}
}
}
//]]>
</script>
<style>
.bs_sticking {background:#ffffff !important; position:fixed !important; top:0; z-index:9999; box-shadow:0px 10px 4px -5px rgba(0,0,0,0.3); margin-top: 0; position:relative\9 !important;}
</style>
One important thing is you have to change the widget ID in the given script after pasting it in to HTML content box .Here, the ID is "PageList1" (6th line)please change it your navigation bar ID which you will find Template Edit HTML option .To get the sticky navigation bar background according to you original background please change the background color at 28 line of script. Now, just save the arrangements and go to your blog and I hope you will find your Navigation bar sticky .If you get any trouble you can ask me any time
 Please click the link for full post: http://www.how2shout.com/wordpress/how-install-wordpress-locally-using-wamp.html