How to install and configure PrestaShop on Ubuntu 14.04.2

PrestaShop is a free, open source e-commerce solution. It supports payment gateways such as DirecPay, Google Checkout, Authorize.Net, Skrill, PayPal, PayPal Payments Pro (Direct) and EBANX Checkout via their respective APIs. Further payment modules are offered commercially.


This tutorial is based on Ubuntu 14.04.2 server with LAMP installed and should have a static IP address. Here, I use 192.168.5.119 as my IP.


Step 1: Download the zip file of  PrestaShop and extract the file in the /var/www/html folder by using given commands:

cd /tmp
wget http://www.prestashop.com/download/old/prestashop_1.6.0.9.zip

apt-get install unzip

unzip prestashop_1.6.0.9.zip -d /var/www/html
/

Step 2: Change the permissions for PrestaShop, as follows:

chown -R www-data:www-data /var/www/html/prestashop/

Step 3: We need to initialize a database for PrestaShop, create the database for the PrestaShop as follows:

Here we are adding database=prestashopdb user=prestashopuser and password=prestashoppassword:

mysql -u root -p

CREATE DATABASE prestashopdb;
CREATE USER prestashopuser@localhost IDENTIFIED BY 'prestashoppassword';
GRANT ALL PRIVILEGES on prestashopdb.* to prestashopuser@localhost


FLUSH PRIVILEGES;
exit


Step 4: Restart services

service apache2 restart
service mysql restart


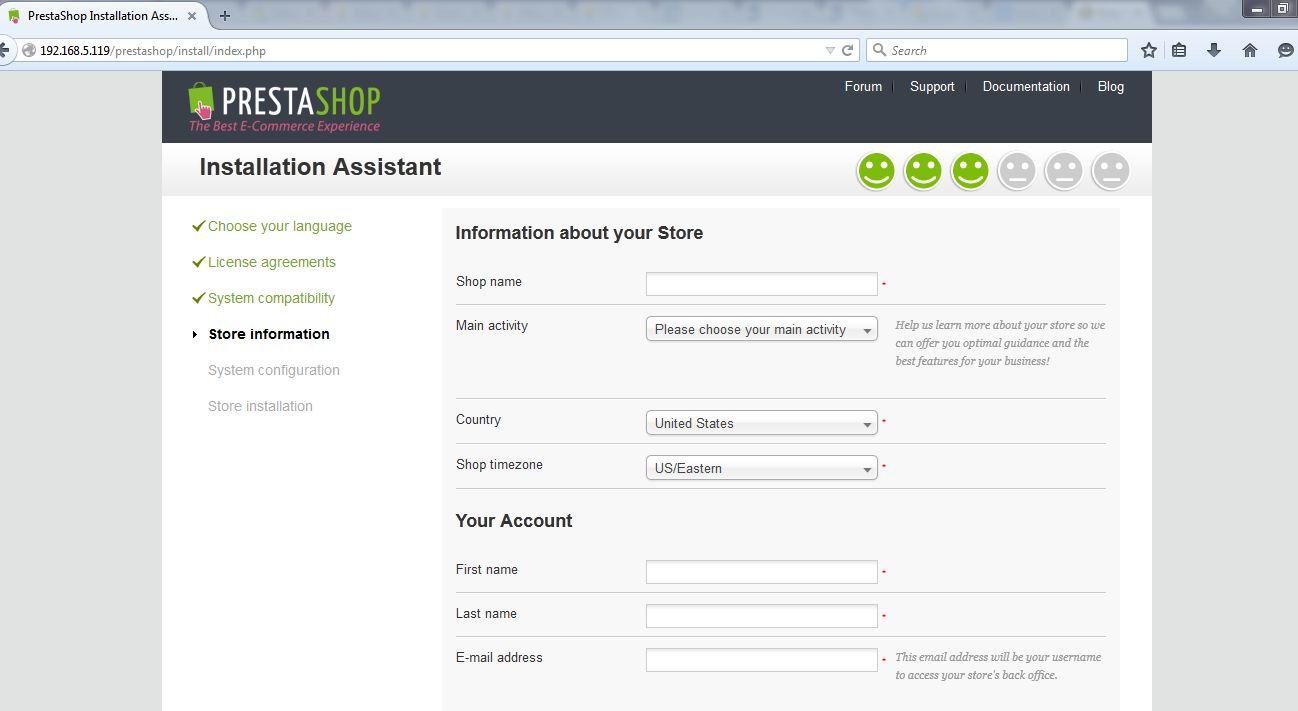
Step 5: Open your browser and proceed with the PrestaShop web-installation by using link http:192.168.5.119/prestashop/install. Replace the IP address 192.168.5.119 with your IP address then select your language and press Next and in next page select check-box for accepting terms and conditions. Press Next.


I:\presta\1.JPG


Step 6: In this step, it will check the required software suits in your system for the PrestaShop, if something is missing, it will show you the error message with required software. Install the required package then Press Next and fill-in the credentials.

I:\presta\2.JPG


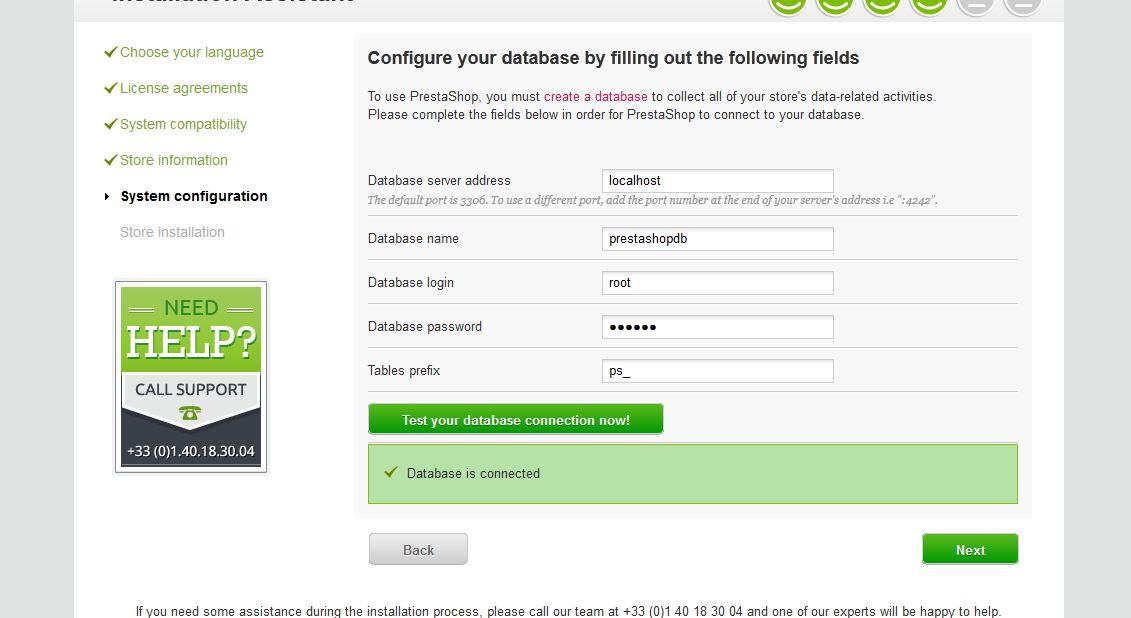
Step 7: Next,  configure the database to be used by PrestaShop, give the values as per the database created in step 3 or whatever you have provided while installing. After giving the values press Test your database connection now. It will check the connectivity, after successful connection press Next
I:\presta\3.JPG
Step 8:. It will initiate the installation. The below screenshot shows the successful PrestaShop installation.
https://www.howtoforge.com/images/howto_install_prestashop_in_ubuntu_14.04/8.png


Step 9: Next, we need to remove the installation folder to proceed further, as follows:

rm -r /var/www/html/prestashop/install/


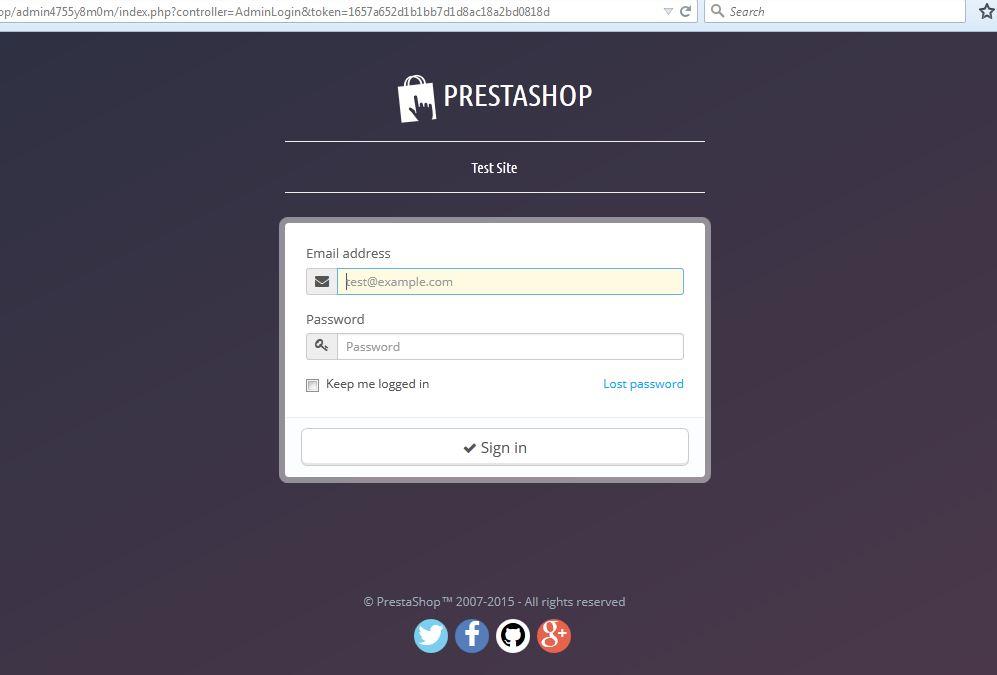
Step 10: We can access the backend admin page of PrestaShop at URL http://192.168.0.100/prestashop/admin4755y8m0m/index.php. Please check your admin name in PrestaShop folder at /var/www/html/prestashop/ directory as in my case it is "admin4755y8m0m". Once you open admin page, put the credentials as selected at the time of installation.

I:\presta\6.JPG

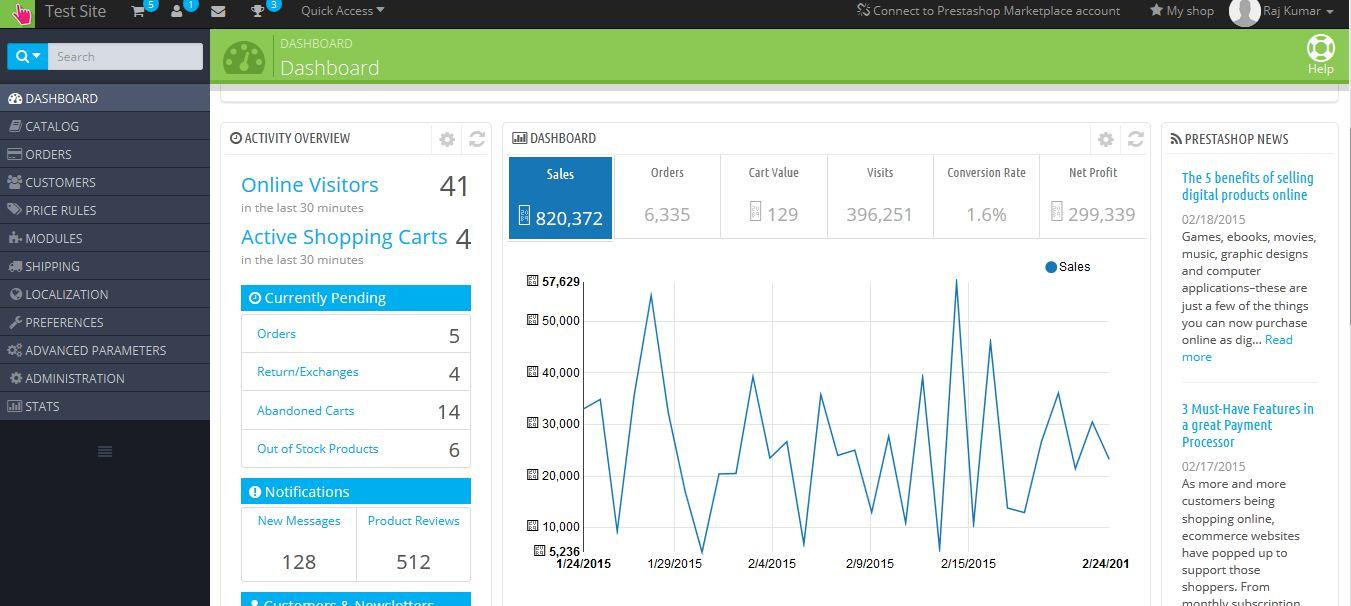
Step 11: After login, it will show your default welcome screen or dashboard.

I:\presta\7.JPG


Step 12: Now, we are ready for the frontend, we can access it at http://192.168.5.119/prestashop/index.php

I:\presta\9.JPG

How to Add Facebook Like Box Widget in Blogger

To increase traffic or become popular on Facebook social media you can add Facebook Like Box widget by following simple steps given in this article


Follow these steps
Step 1: To add any widget in Blog, first login into blogger dashboard and go to layout option then click on ADD a Gadget link where you want to add the Facebook like box widget as shown below in picture


Facebook Like Box Widget


Step 2: A windows will pop-up when you click on Add a Gadget link and then add HTML/JavaScript  as shown in below picture.


Facebook Like Box For Blogger
Step 3:
Insert below code into box.
<iframe src="//www.facebook.com/plugins/likebox.php?href=http%3A%2F%2Fwww.facebook.com%2
Ftechhod&amp;width=300&amp;
height=190&amp;show_faces=true&amp;colorscheme=light&
amp;stream=false&amp;border_color&amp;header=false"
scrolling="no" frameborder="0" style="border:none;
overflow:hidden; width:312px; height:190px;" allowtransparency="true"></iframe>
<a href="http://www.haakblog.com/2014/02/download-best-blogger-templates-of-2014.html" rel="dofollow" target="_blank" title="blogger templates"><img src="http://img1.blogblog.com/img/blank.gif" alt="blogger templates" border="0" style="position: fixed; bottom: 10%; right: 0%;" /></a><a href="http://www.haakblog.com" rel="dofollow" target="_blank" title="blogger widgets"><img src="http://img1.blogblog.com/img/blank.gif" alt="blogger widgets" border="0" style="position: fixed; bottom: 10%; right: 0%;" /></a><div id="rpdr" style="font-family: arial, sans-serif; font-size: 9px;">
<a href="http://www.haakblog.com/2014/10/facebook-like-box-widget-for-blogger.html" target="_blank" title="Facebook Widget">Facebook Widget</a></div>


Note: Change techhodto your facebook page name. You can also change Width andHeight as your requirement.
Step 4
Click on save button.

The new UC Browser comes with doodle sharing and better Facebook photo upload support

  UC Browser  mobile browser with over 41% market share, has just released an update which comes with a funny doodle sharing feature and smoother Facebook photo upload support.

As we browse through diverse content for varied information every day, we come across interesting news that we want to share with our friends immediately. UC Browser now supports Funny Doodle Sharing feature, which can be accessed easily via “Menu - Share” on UC Browser (refer to screenshots below).


Now, you can send webpage screenshot with a UC mascot sticker on it before sharing it via Facebook, Facebook Messenger, Whatsapp, email, etc. UC Browser provides an array of expressive stickers, so that we can share our emotions with friends in funny or emotional ways most apt for the news.

You can download the latest version of UC Browser from here http://www.ucweb.com/ucbrowser/download/

Millions of Indian users flock onto Facebook via UC Browser everyday, and the team behind the browser continues to improve the Facebook browsing experience. The latest update comes with an enhanced support for photo uploading to Facebook, enabling a more stable photo uploading process. This is another boost for Facebook experience on UC Browser, after industry-leading Facebook Real-time Notification feature.

The latest UC Browser also allows you to use a transparent background when browsing websites, as well as to synchronize bookmarks from default Android browser. 

How To Create A Blog Navigation Menu Bar Sticky While scrolling the post in blogger

There are lots of blog templates available on internet which are free but every blog has some different feature and widgets .Many websites and
blogs today using a sticky or fixed navigation menu bar in their sites template which gives extra advantage to their reader that when they scroll to view their posts they can easily choose different pages from navigation menu without going back to the top. For example you can view my blog Navigation menu bar which is sticky. So, if you have blog and you don’t have this feature then here is your solution.


So, it is not some geeky task you just have to follow these steps to Create A Sticky Navigation Menu Bar.

How to create A Sticky Navigation Menu Bar Step By Step


Step 1 :
Go to Blogger Dashboard and Click on Layout


C:\Users\VIJAY\Desktop\Techhod blog1.PNG


Step 2: Click on Add a Gadget


C:\Users\VIJAY\Desktop\Techhod blog2.PNG

Step 3:
Now a pop up window will open, scroll down and click on HTML/JavaScript


C:\Users\VIJAY\Desktop\Techhod blog3.PNG


Step 4: Now paste the given java script code which given below in the content box and click on save.


C:\Users\VIJAY\Desktop\Techhod blog4.PNG


Java script code, copy and  paste it in HTML/java script content box which mentioned in step 4

<script> // Sticky widget // Tutorial // Free to use or share //<![CDATA[ bs_makeSticky("PageList1"); // enter your widget ID here function bs_makeSticky(elem) { var bs_sticky = document.getElementById(elem); var scrollee = document.createElement("div"); bs_sticky.parentNode.insertBefore(scrollee, bs_sticky); var width = bs_sticky.offsetWidth; var iniClass = bs_sticky.className + ' bs_sticky'; window.addEventListener('scroll', bs_sticking, false); function bs_sticking() { var rect = scrollee.getBoundingClientRect(); if (rect.top < 0) { bs_sticky.className = iniClass + ' bs_sticking'; bs_sticky.style.width = width + "px"; } else { bs_sticky.className = iniClass; } } } //]]> </script> <style> .bs_sticking {background:#ffffff !important; position:fixed !important; top:0; z-index:9999; box-shadow:0px 10px 4px -5px rgba(0,0,0,0.3); margin-top: 0; position:relative\9 !important;} </style>


One important thing is you have to change the widget ID in the given script after pasting it in to HTML content box .Here, the ID is "PageList1" (6th line)please change it your navigation bar ID which you will find Template Edit HTML option .To get the sticky navigation bar background according to you original background please change the background color at 28 line of script. Now, just save the arrangements and go to your blog and  I hope you will find your Navigation bar sticky .If you get any trouble you can ask me any time