How to install and configure PrestaShop on Ubuntu 14.04.2

PrestaShop is a free, open source e-commerce solution. It supports payment gateways such as DirecPay, Google Checkout, Authorize.Net, Skrill, PayPal, PayPal Payments Pro (Direct) and EBANX Checkout via their respective APIs. Further payment modules are offered commercially.


This tutorial is based on Ubuntu 14.04.2 server with LAMP installed and should have a static IP address. Here, I use 192.168.5.119 as my IP.


Step 1: Download the zip file of  PrestaShop and extract the file in the /var/www/html folder by using given commands:

cd /tmp
wget http://www.prestashop.com/download/old/prestashop_1.6.0.9.zip

apt-get install unzip

unzip prestashop_1.6.0.9.zip -d /var/www/html
/

Step 2: Change the permissions for PrestaShop, as follows:

chown -R www-data:www-data /var/www/html/prestashop/

Step 3: We need to initialize a database for PrestaShop, create the database for the PrestaShop as follows:

Here we are adding database=prestashopdb user=prestashopuser and password=prestashoppassword:

mysql -u root -p

CREATE DATABASE prestashopdb;
CREATE USER prestashopuser@localhost IDENTIFIED BY 'prestashoppassword';
GRANT ALL PRIVILEGES on prestashopdb.* to prestashopuser@localhost


FLUSH PRIVILEGES;
exit


Step 4: Restart services

service apache2 restart
service mysql restart


Step 5: Open your browser and proceed with the PrestaShop web-installation by using link http:192.168.5.119/prestashop/install. Replace the IP address 192.168.5.119 with your IP address then select your language and press Next and in next page select check-box for accepting terms and conditions. Press Next.


I:\presta\1.JPG


Step 6: In this step, it will check the required software suits in your system for the PrestaShop, if something is missing, it will show you the error message with required software. Install the required package then Press Next and fill-in the credentials.
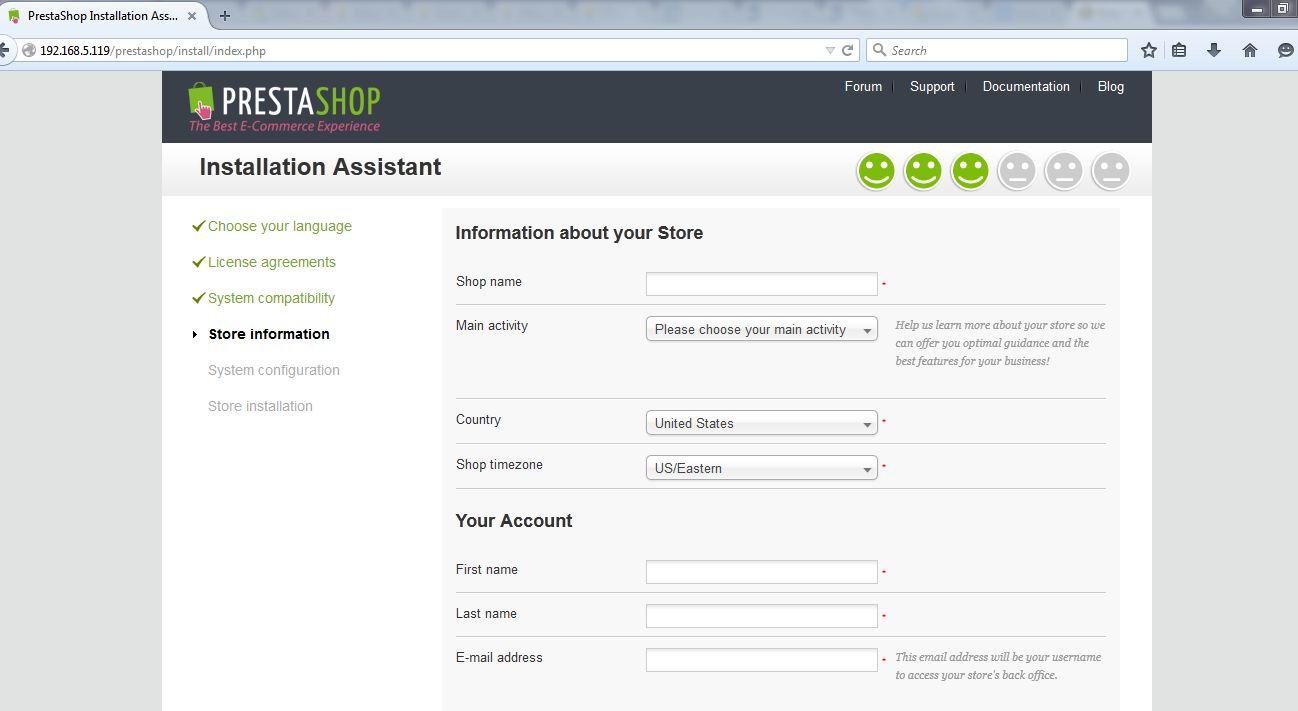
I:\presta\2.JPG


Step 7: Next,  configure the database to be used by PrestaShop, give the values as per the database created in step 3 or whatever you have provided while installing. After giving the values press Test your database connection now. It will check the connectivity, after successful connection press Next
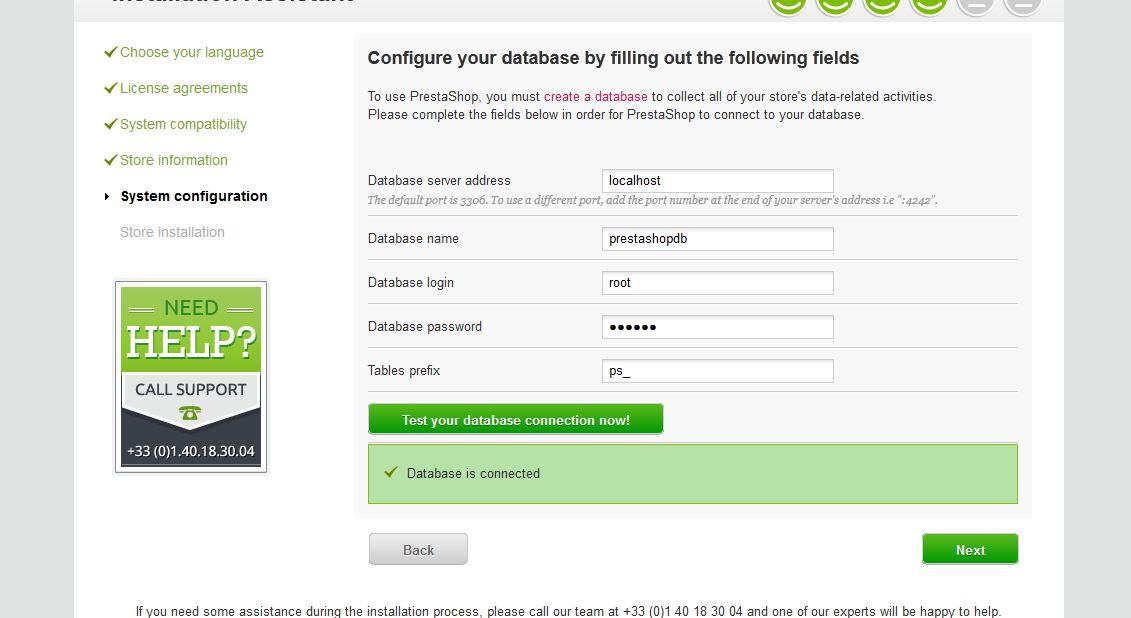
I:\presta\3.JPG
Step 8:. It will initiate the installation. The below screenshot shows the successful PrestaShop installation.
https://www.howtoforge.com/images/howto_install_prestashop_in_ubuntu_14.04/8.png


Step 9: Next, we need to remove the installation folder to proceed further, as follows:

rm -r /var/www/html/prestashop/install/


Step 10: We can access the backend admin page of PrestaShop at URL http://192.168.0.100/prestashop/admin4755y8m0m/index.php. Please check your admin name in PrestaShop folder at /var/www/html/prestashop/ directory as in my case it is "admin4755y8m0m". Once you open admin page, put the credentials as selected at the time of installation.
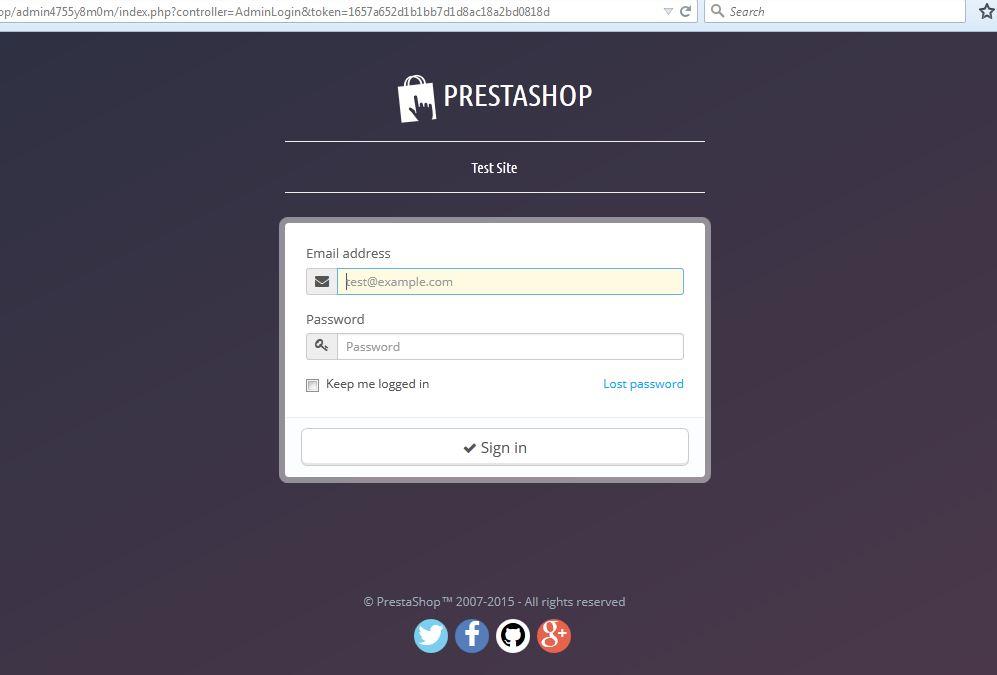
I:\presta\6.JPG

Step 11: After login, it will show your default welcome screen or dashboard.
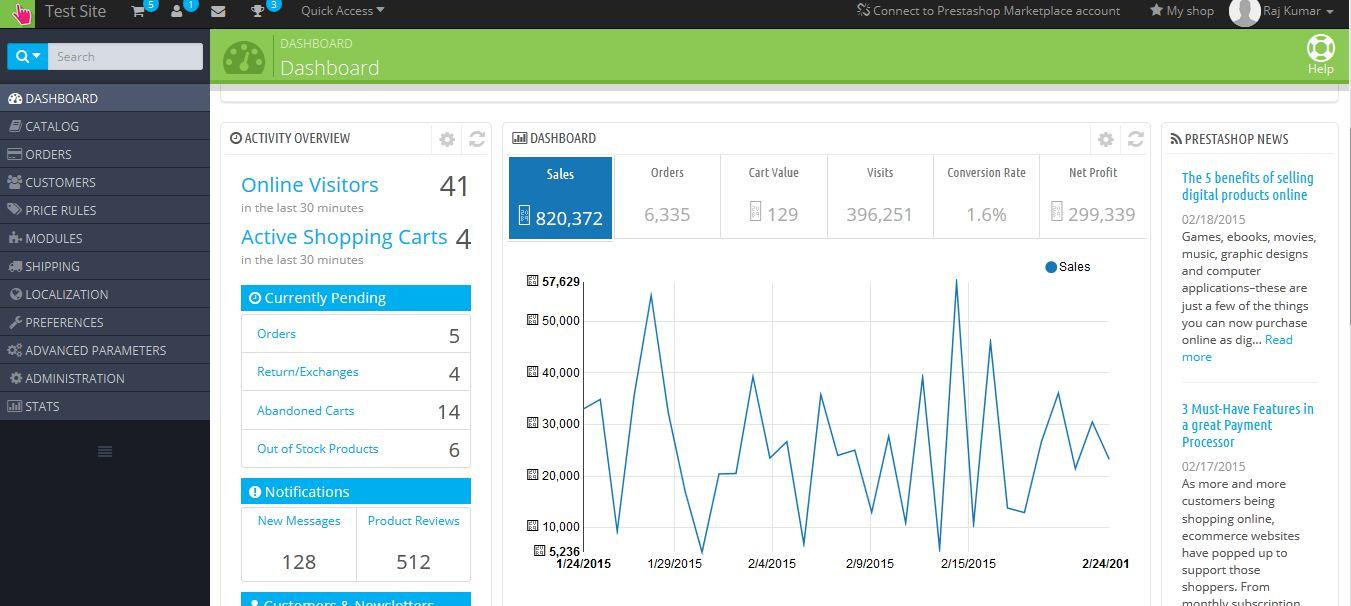
I:\presta\7.JPG


Step 12: Now, we are ready for the frontend, we can access it at http://192.168.5.119/prestashop/index.php

I:\presta\9.JPG

How to connect Remote desktop Connection From Window 7/8 to Ubuntu 14.04

Remote Desktop Connection of Ubuntu 14.04
Many times we need to operate computer remotely in a network, it is easy when both systems have same OS example Windows to Windows or Linux to Linux .But what happen if you want to access a Ubuntu running machine remotely by windows pc via RDP(remote desktop connection).By default Linux doesn’t support RDP connection but it is possible with some third party tool. For creating a RDP connection  with ubuntu 14.04 follow the given below steps.
Requirements:
  • Xrdp install on ubuntu 14.04
  • Ubuntu 14.04 desktop with administrative privileges
  • Mate an alternative 2D desktop environment install from Mint.
  • Window 7 /8
  • Internet connection
Installation:
Step 1:  First you have to install Mate Desktop environment in your Ubuntu Machine because the popular unity which is the default shell for GNOME 3 environment used by Ubuntu 14.04  is not  accessible form XRDP, it shows black screen in ubuntu 14.04.You can also visit their site http://mate-desktop.org/ , if you wish to install it in other than ubuntu. Run the following command in terminal to add Mate repositrory.
Add Repository
sudo add-apt-repository "deb http://repo.mate-desktop.org/archive/1.8/ubuntu trusty main"

or alternatively using the text editor of your choice add the following to /etc/apt/sources.list:
deb http://repo.mate-desktop.org/archive/1.8/ubuntu trusty main
Install MATE 1.8

sudo apt-get update
# This will install the base packages required for a minimal MATE desktop
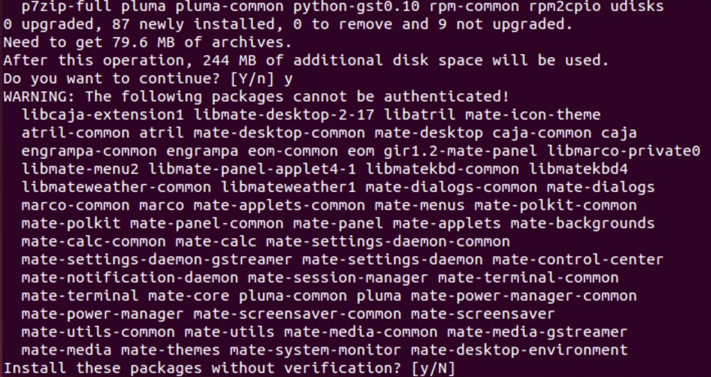
sudo apt-get install mate-desktop-environment mate-notification-daemon
# It will install mate desktop environment


C:\Users\Raj\Desktop\step1.PNG

Step 2: Install third party application XRDP in Ubuntu .For doing this run following command
Install XRDP
sudo apt-get install xrdp

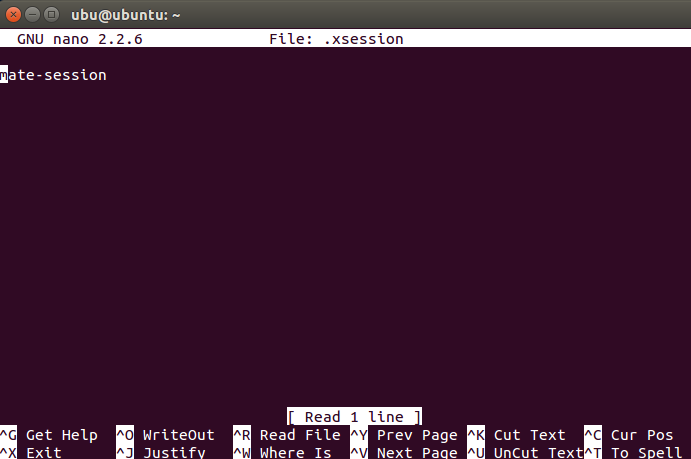
Step 3: Now, we have to configure XRDP so that Windows can get Ubutnu remote desktop connection. For doing this we have to create a .xession file under home directory .Make sure the .xsession file is in your home directory because without it you can’t get the remote session .Each person you want to have remote desktop to your Ubuntu 14.04 desktop will need an .xsession file in their home directory.
Creating .Xession file
echo mate-session > ~/.xsession
# Command to create .xession file with text mate-session
nano .xession
# To check whether the file created or not
# To get exit from nano press ctrl+x


C:\Users\Raj\Desktop\stepo 2.PNG

Step 3: Restart the XRDP service.
Sudo service xrdp restart
#to restart xrdp service

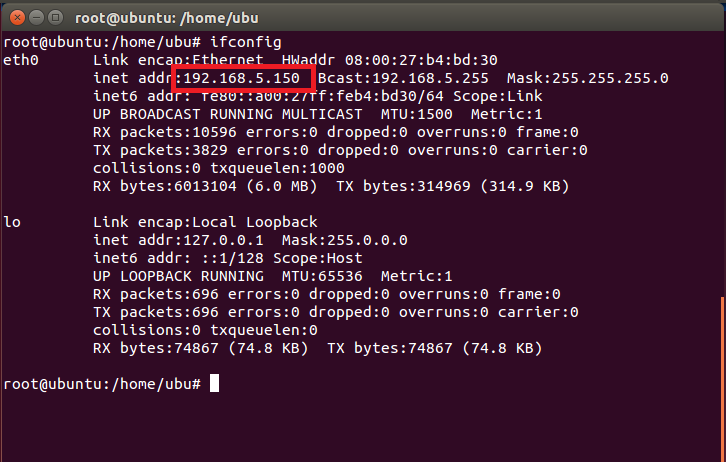
Step4:  To Connect your Windows machine with Ubutnu machine. First you should know the IP address of your Ubuntu machine, type ifconfig to get an  IP address.
Ifconfig
# to see your ip address

C:\Users\Raj\Desktop\step3.PNG
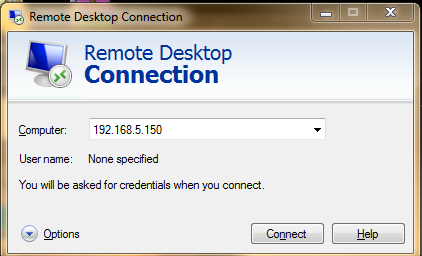
Step 5: Go to your Windows machine and run remote desktop connection tool with the IP address of your Ubuntu machine. Here, our ubuntu machine IP address is 192.168.5.150.
C:\Users\Raj\Desktop\step 4.PNG

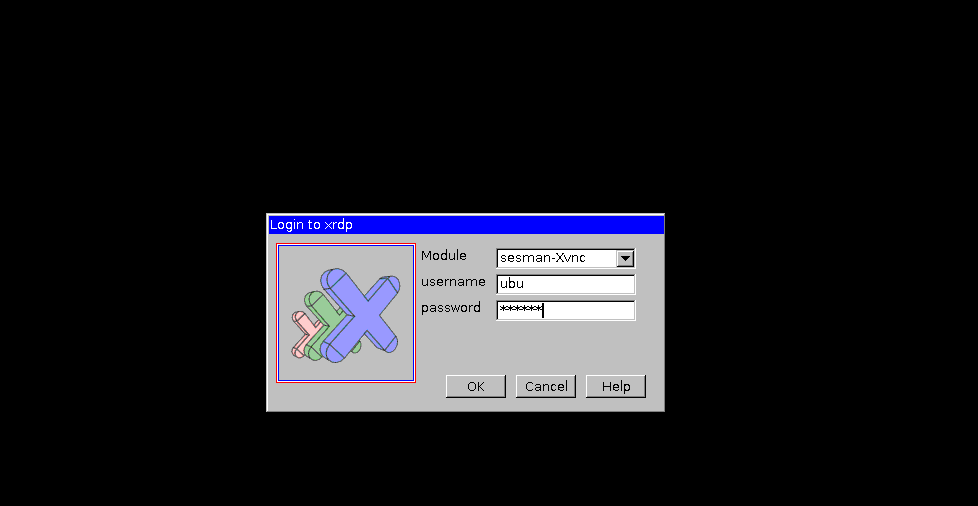
Step 6: Here in RDP window you will ask for your Ubuntu credentials. Just give your username and password associated with your ubuntu account.
C:\Users\Raj\Desktop\satep 6.PNG

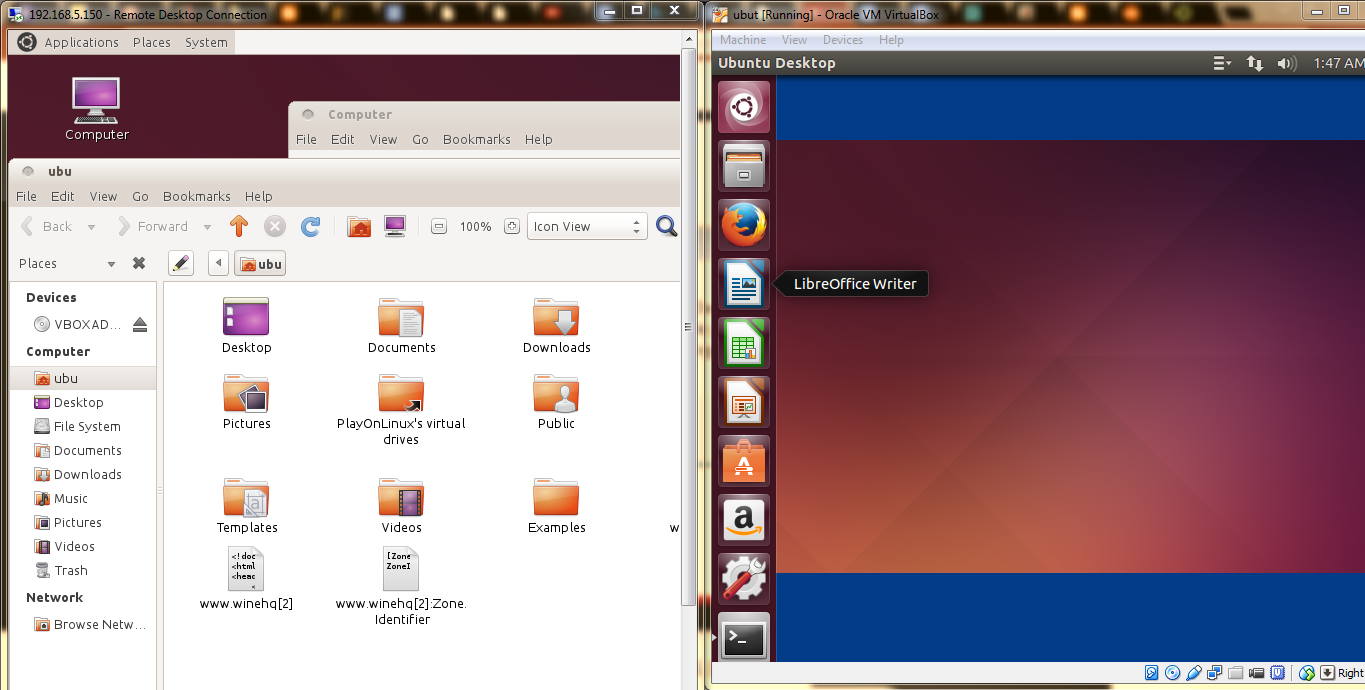
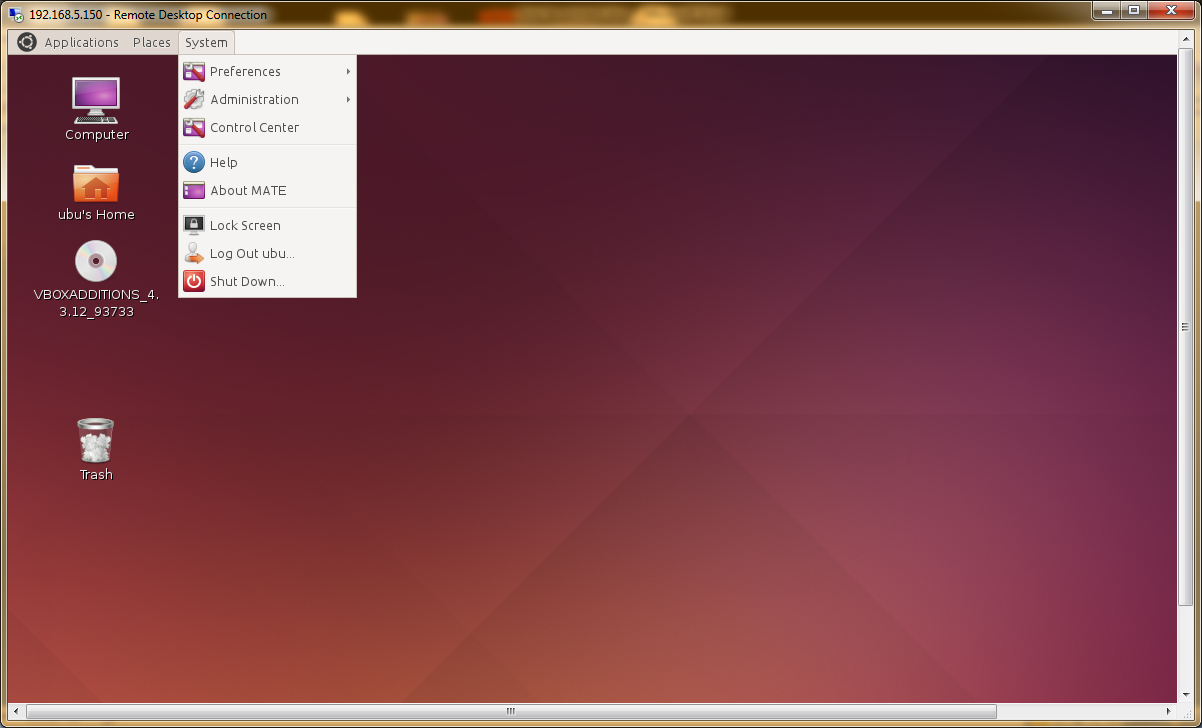
Step 7: You might get black window at start-up of your remote connection but wait for some seconds and a miracle will happen. Now, we hope you got your Ubuntu remote desktop but it will be different in interface wise because you install mate for your remote session. Moreover, the work or task you have do in remote session  is totally independent from your physical Ubuntu machine. Here, screenshots given is one of our Ubuntu machine and another remote session of that Ubuntu machine. Unlike Windows in which at one only one person can perform task on one machine either remotely or physically.  

C:\Users\Raj\Desktop\step9.PNG

Step 8: In your remote session which taken from Windows , if you end that session your all open file like word file or any other will get end and you lose your data if you hadn’t save that .So, to get same session when you come back and connect with your Ubuntu run following command.

Sudo  nano /etc/xrdp/xrdp.ini
# configure xrdp


C:\Users\Raj\Desktop\step10.PNG

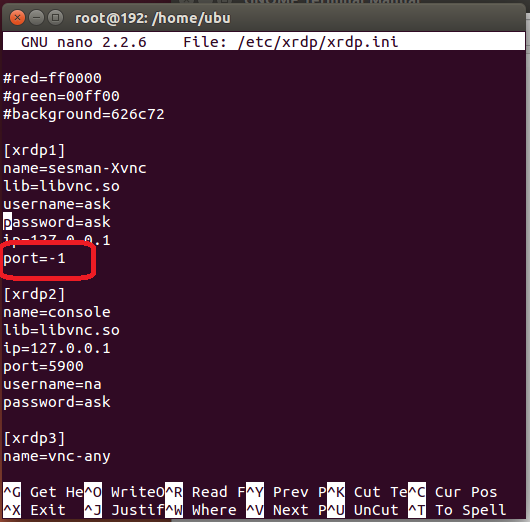
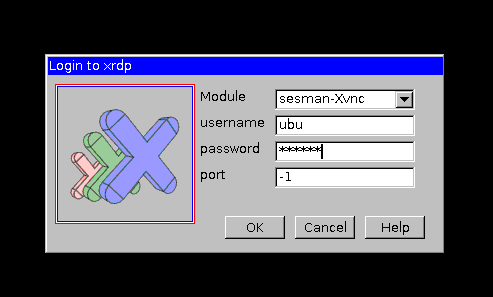
Step 9: Now, a nano editor will open  in which you have to look for xrdp1 and change port=-1 to port=ask-1 and press crtl +x to exit it will ask you for save press y and then press enter. Again go to windows and run RDP to connect with the Ubuntu. This time in credentials box one more option will appear that is port.

C:\Users\Raj\Desktop\step11.PNG

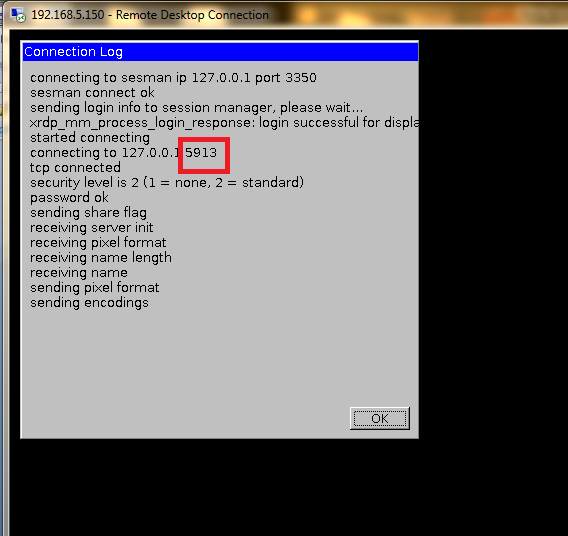
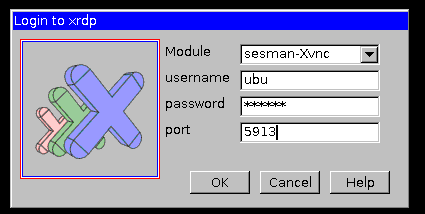
Step 10: Once you fill your username and password, press ok  and a connection log will appear for very short time but you have to note down the tcp port number in our case it is 5913. You can look it in to given screenshot. But it might be different in your case.

C:\Users\Raj\Desktop\step12.PNG

Step 11: If you want to connect the same session every time then use this port number in credential box port column to connect with your Ubuntu machine.In this way you will never lost your work.

C:\Users\Raj\Desktop\step123.PNG

C:\Users\Raj\Desktop\Untitled.png

If you need any help just write down in the comment box or email us. You can also suggest the topics on which you want some tutorials.  

How to Install And Customized Zorion Os To Give It Look Like MacOs- Maczorin Os

Preview after customizing
Zorin OS is a multi-functional operating system designed specifically for newcomers to Linux. It is based on Ubuntu which is the most popular desktop Linux operating system in the world. Zorin OS has a unique Look Changer program that helps in customization of  Zorin OS. It allows users to change the user interface at the touch of a button. Other unique programs include Internet Browser Manager, Background Plus and more. Zorin OS gives users more flexibility by including preinstalled WINE and PlayOnLinux that run Microsoft Windows programs in Zorin OS with the help of.
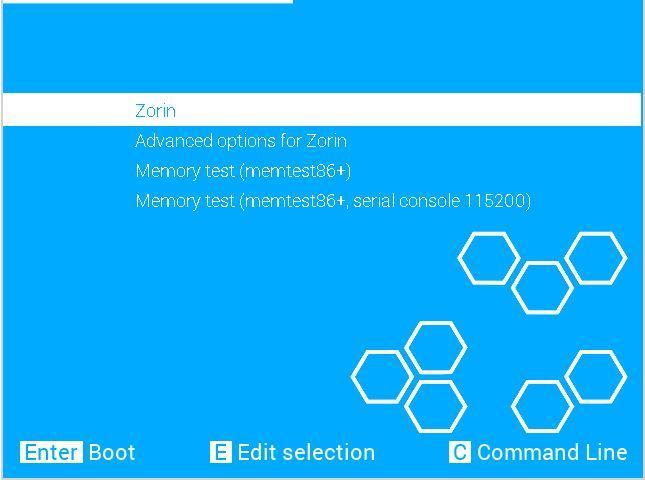
Step1: First go to the Download page and download Zorin OS. Download Link: http://zorin-os.com/index.html.When the download is finished burn the image file to a blank DVD. When the burning process is completed insert the DVD into the computer and restart with it still in. The computer should boot from the DVD, if not you should change the settings in the BIOS or press F12 (or whatever key it is to select the boot device) while booting up again.
C:\Users\Raj\Desktop\zonion 1.JPG
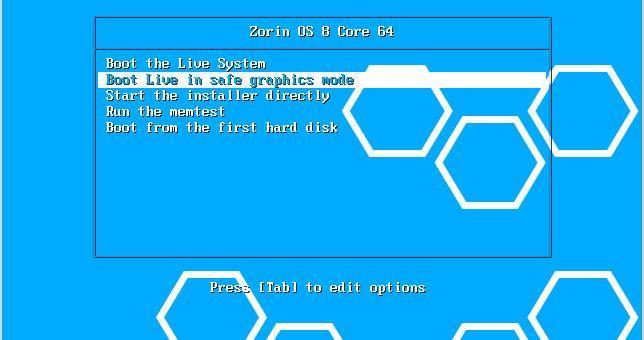
Step2: Press  start the installer directly option to install it or just boot the live system  to start the LiveDVD which run the operating system off the DVD without installing it onto your computer to get a preview.
NOTE: The Live DVD runs much slower than after the full installation.
C:\Users\Raj\Desktop\zonion 2.JPG
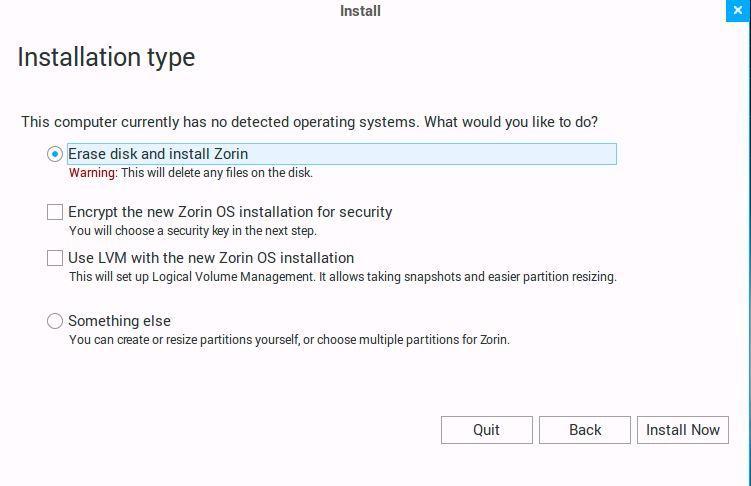
Step3: Later you will be prompted to make a new partition; a partition is a thing you make if you want to install an alternate operating system. This slices your Hard Drive to allow the installation of another operating system. The minimum size for Zorin OS Core is 5 Gigabytes (Just remember to leave enough space for your first operating system)
. C:\Users\Raj\Desktop\zonion 3.JPG
Step4: During the installation you will be asked to select your language (over 55 are available), your location, time settings, keyboard layout, partitioning settings and import your files, settings and user accounts and password. The installation should take 10 minutes up to an hour depending upon your system performance.
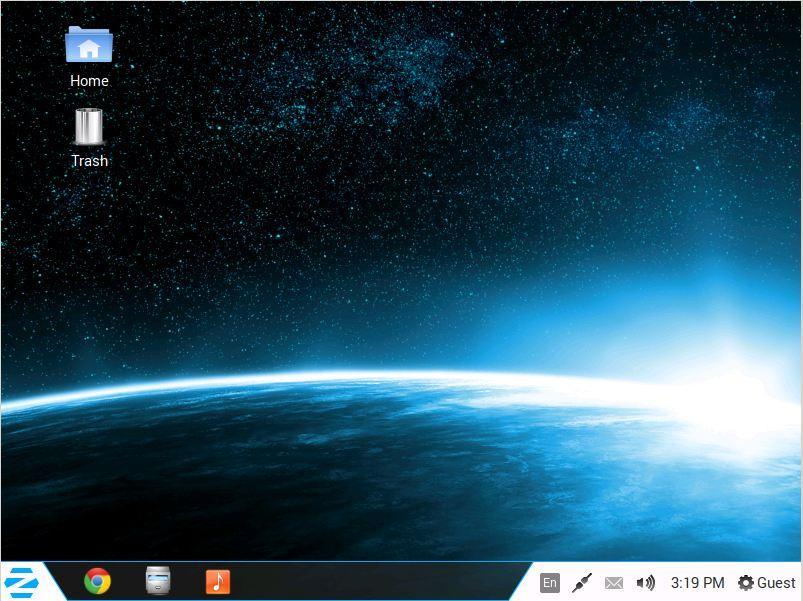
Step5: After the installation you will be prompted to restart the computer, after the restart the computer should boot up into a menu where you choose which operating system you want to start. To select one use the arrow keys to highlight an option and press the Enter key to start the highlighted one.
C:\Users\Raj\Desktop\zorion.JPG
Now you should have Zorin OS installed to your computer which is something look like this C:\Users\Raj\Desktop\zoron5.JPG  
but you can easily customized it according to your need here we are going to customized it to look like a mac os.
Customization
Step 6:  Install Latest Cairo Dock from their site http://glx-dock.org/ after installing execute this command to enable it cairo-dock –o or you can also install it run these command in terminal. Once it installed right click on dock and go to config and give effects according to your choice.
sudo add-apt-repository ppa:cairo-dock-team/ppa
sudo apt-get update
sudo apt-get install cairo-dock cairo-dock-plug-ins


C:\Users\Raj\Desktop\cairo-dock-2.2.jpg
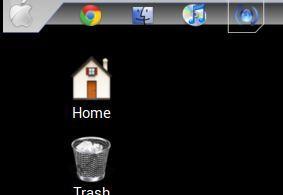
Step7: Install New Apple Logo in Launcher


wget -O apple-logo.zip http://drive.noobslab.com/data/themes/mac/apple-logo.zip
sudo unzip apple-logo.zip -d /usr/share/unity/5/

C:\Users\Raj\Desktop\apple logo.JPG


Step 8: To Install Mac OS X Lion Theme  and  Icons on zorin.
sudo add-apt-repository ppa:noobslab/themes
sudo apt-get update
sudo apt-get install mac-ithemes-v2-noobslab
sudo apt-get install mac-icons-v2-noobslab


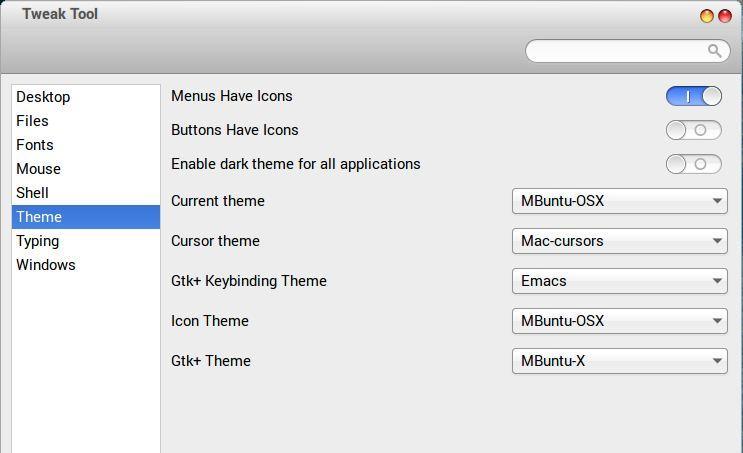
Step 9 : After installing theme go to system tools ->preference –>tweak tool from where you can set your new mac theme.
C:\Users\Raj\Desktop\tweak tool.JPG


Step10: To install Mac cursor type following command in terminal.
wget -O mac-cursors.zip http://drive.noobslab.com/data/themes/mac/mac-cursors.zip
sudo unzip mac-cursors.zip -d /usr/share/icons/; rm mac-cursors.zip
cd /usr/share/icons/mac-cursors
sudo chmod +x install-mac-cursors.sh uninstall-mac-cursors.sh
sudo ./install-mac-cursors.sh


Step11: Now, add some effects to your zorin.First install compiz setting manager, for this type the following command
sudo apt-get install compizconfig-settings-manager
Now, open compiz and go to effects select animations option and select minimize option ->select current animation and click on edit, it will pop up a window from where select Magic Lamp option. Same procedure for changing unminimize animation
C:\Users\Raj\Desktop\animation.JPG
Finally you got the Your customized Maczorin Os C:\Users\Raj\Desktop\attachments\Screenshot from 2014-05-23 11_37_49 - 1.png
C:\Users\Raj\Desktop\attachments\Screenshot from 2014-05-23 11_36_24.png